Difference between revisions of "DIVA Happiness Level (2nd)"
(Imported from text file) |
imported>Kyo-chan m |
||
| Line 1: | Line 1: | ||
| − | + | Character moods are determined by how much attention you give that character. You can lift their moods by game-playing with that character and/or giving them presents in their DIVA Room. You'll be able to tell when characters' moods are down by their body language when you select them in Character Select. Or, when unsure, you can view the Character Mood Viewer (キャラクター機嫌確認) chart through Player Records (プレイレコード) on the Main Menu. The moods of all characters will fall when you fail a song.<br /> | |
| − | + | ||
| − | + | You might find if the present suits that character, or it's an expensive item, they will cheer on the spot (and the item will become a room feature). Such items have a bigger impact on mood change. At first when you do not have a characters DIVA room it will appear to be in a good mood. Some characters such as Meiko, Neru, and Haku are easier to cheer up than Luka, Rin, Len and Miku. Miku is mostly always happy as well.<br /> | |
| − | + | ||
| + | (Note: Giving a character a certain kind of item (i.e. wall item, shelf item) as a feature item and then giving another item of the same kind will replace the previous item and you won't get it back. For example: if Neru already has the telephone as her feature item and you give her a Nendoroid Neru, the Nendoroid Neru will take the place of where the telephone was.)<br /> <br />These particular pairings: | ||
| + | |||
====Hatsune Miku==== | ====Hatsune Miku==== | ||
| − | + | └ Nendoroid Miku<br /> └ Leek Body Pillow<br /> └ Leek Decoration<br /> └ Heart Shaped Cushion<br /> └ Flower Basket<br /> ''└'' Wrapped Candy | |
| − | + | ||
| − | + | ==== Kagamine Rin ==== | |
| + | └ Nendoroid Rin<br /> └ Chalk Board<br /> └ Star Tapestry<br /> └ Heart Shaped Cushion<br /> └ Flower Basket<br /> ''└'' Wrapped Candy<br /> ''└'' Piko Piko Hammer | ||
| + | |||
| + | ==== Kagamine Len ==== | ||
| + | └ Nendoroid Len<br /> └ Synthesizer<br /> └ Basketball Hoop<br /> └ Cactus<br /> └ Wrapped Chocolates<br /> └ Route 39 Sign<br /> └ Fan | ||
| + | |||
| + | ==== Megurine Luka ==== | ||
| + | └ Nendoroid Luka<br /> └ Heart Shaped Cushion<br /> └ Jewelry Box<br /> └ Magic Mirror<br /> └ Speaker with Stand<br /> └ Flower Basket<br /> ''└'' Wrapped Candy | ||
| + | |||
====Kaito==== | ====Kaito==== | ||
| − | + | └ Nendoroid Kaito<br /> └ Electric Guitar<br /> └ Ten Gallon Hat<br /> └ Tower of Cards<br /> └ Wrapped Chocolates<br /> ''└'' Route 39 Sign | |
| − | + | ||
====Meiko==== | ====Meiko==== | ||
| − | + | └ Nendoroid Meiko<br /> ''<span style="font-style: normal">└ Heart Shaped Cushion</span>''<br /> ''<span style="font-style: normal">└ Balance Ball</span>''<br /> ''└'' Blue Diamond<br /> ''└'' Flower Basket<br /> ''└'' Wrapped Candy | |
| + | |||
====Akita Neru==== | ====Akita Neru==== | ||
| − | + | └ Nendoroid Neru<br /> └ Telephone<br /> └ Heart Shaped Cushion<br /> └ Gold Disc<br /> ''└'' Flower Basket<br /> ''└'' Wrapped Candy | |
| + | |||
====Yowane Haku==== | ====Yowane Haku==== | ||
| − | + | └ Nendoroid Haku<br /> └ Scroll (Low)<br /> └ Heart Cushion<br /> └ Flower Basket<br /> └ Lantern<br /> ''└'' Wrapped Candy | |
| + | |||
====Sakine Meiko==== | ====Sakine Meiko==== | ||
| − | + | └ Nendoroid Sakine Meiko<br /> ''<span style="font-style: normal">└ Heart Shaped Cushion</span>''<br /> ''└'' Flower Basket<br /> ''└'' Wrapped Candy<br /> <br /> | |
| − | = | + | |
| − | + | ==Character Poses== | |
| − | + | Depending on the characters' mood, their poses can change. | |
| − | [[Image:Miku%20HAPPY.PNG|Miku HAPPY.PNG]] | + | {| class="wikitable" |
| − | = | + | |+Hatsune Miku |
| − | + | !Happy | |
| − | = | + | !Good |
| − | + | !Bad | |
| − | = | + | |- |
| − | + | |[[Image:Miku%20HAPPY.PNG|Miku HAPPY.PNG|200x200px]] | |
| − | = | + | |[[Image:Miku%20GOOD.PNG|Miku GOOD.PNG|200x200px]] |
| − | + | |[[Image:Miku%20BAD.PNG|Miku BAD.PNG|200x200px]] | |
| − | = | + | |} |
| − | + | {| class="wikitable" | |
| − | = | + | |+Kagamine Rin |
| − | + | !Happy | |
| − | = | + | !Good |
| − | + | !Bad | |
| + | |- | ||
| + | |[[Image:Rin%20GOODHAPPY.PNG|Rin GOODHAPPY.PNG|200x200px]] | ||
| + | |[[Image:Rin%20GOODHAPPY.PNG|Rin GOODHAPPY.PNG|200x200px]] | ||
| + | |[[Image:Rin%20BAD.PNG|Rin BAD.PNG|200x200px]] | ||
| + | |} | ||
| + | {| class="wikitable" | ||
| + | |+Kagamine Len | ||
| + | !Happy | ||
| + | !Good | ||
| + | !Bad | ||
| + | |- | ||
| + | |[[Image:Len%20GOOD.PNG|Len GOOD.PNG|200x200px]] | ||
| + | |[[Image:Len%20GOOD.PNG|Len GOOD.PNG|200x200px]] | ||
| + | |[[Image:Len%20BAD.PNG|Len BAD.PNG|200x200px]] | ||
| + | |} | ||
| + | {| class="wikitable" | ||
| + | |+Megurine Luka | ||
| + | !Happy | ||
| + | !Good | ||
| + | !Bad | ||
| + | |- | ||
| + | |[[Image:Luka%20GOODHAPPY.PNG|Luka GOODHAPPY.PNG|200x200px]] | ||
| + | |[[Image:Luka%20GOODHAPPY.PNG|Luka GOODHAPPY.PNG|200x200px]] | ||
| + | |[[Image:Luka%20BAD.PNG|Luka BAD.PNG|200x200px]] | ||
| + | |} | ||
| + | {| class="wikitable" | ||
| + | |+<span style="font-size: 1.066em">KAITO</span> | ||
| + | !<span style="font-size: 1.066em">Happy</span> | ||
| + | !<span style="font-size: 1.066em">Good</span> | ||
| + | !<span style="font-size: 1.066em">Bad</span> | ||
| + | |- | ||
| + | |[[Image:Kaito%20HAPPYGOOD.PNG|Kaito HAPPYGOOD.PNG|200x200px]] | ||
| + | |[[Image:Kaito%20HAPPYGOOD.PNG|Kaito HAPPYGOOD.PNG|200x200px]] | ||
| + | |[[Image:Kaito%20BAD.PNG|Kaito BAD.PNG|200x200px]] | ||
| + | |} | ||
| + | {| class="wikitable" | ||
| + | |+MEIKO | ||
| + | !Happy | ||
| + | !Good | ||
| + | !Bad | ||
| + | |- | ||
| + | |[[Image:Meiko%20HAPPY.PNG|Meiko HAPPY.PNG|200x200px]] | ||
| + | |[[Image:Meiko%20GOOD.PNG|Meiko GOOD.PNG|200x200px]] | ||
| + | |[[Image:Meiko%20BAD.PNG|Meiko BAD.PNG|200x200px]] | ||
| + | |} | ||
| + | {| class="wikitable" | ||
| + | |+Akita Neru | ||
| + | !Happy | ||
| + | !Good | ||
| + | !Bad | ||
| + | |- | ||
| + | |[[Image:Neru%20GOODHAPPY.PNG|Neru GOODHAPPY.PNG|200x200px]] | ||
| + | |[[Image:Neru%20GOOD.PNG|Neru GOOD.PNG|200x200px]] | ||
| + | |[[Image:Neru%20BAD.PNG|Neru BAD.PNG|200x200px]] | ||
| + | |} | ||
| + | {| class="wikitable" | ||
| + | |+Yowane Haku | ||
| + | !Happy | ||
| + | !Good | ||
| + | !Bad | ||
| + | |- | ||
| + | |[[Image:Haku%20HAPPY.PNG|Haku HAPPY.PNG|200x200px]] | ||
| + | |[[Image:Haku%20GOOD.PNG|Haku GOOD.PNG|200x200px]] | ||
| + | |[[Image:Haku%20BAD.PNG|Haku BAD.PNG|200x200px]] | ||
| + | |} | ||
| + | {| class="wikitable" | ||
| + | |+Sakine Meiko | ||
| + | !Happy | ||
| + | !Good | ||
| + | !Bad | ||
| + | |- | ||
| + | |[[Image:Sakine%20HAPPY.PNG|Sakine HAPPY.PNG|200x200px]] | ||
| + | |[[Image:Sakine%20HAPPY.PNG|Sakine HAPPY.PNG|200x200px]] | ||
| + | |[[Image:Sakine%20BAD.PNG|Sakine BAD.PNG|200x200px]] | ||
| + | |} | ||
| + | <br /> | ||
Latest revision as of 05:22, 31 October 2019
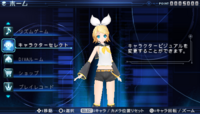
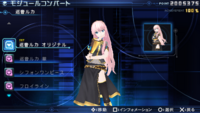
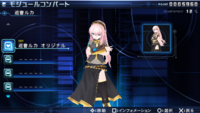
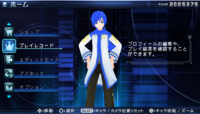
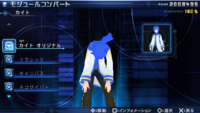
Character moods are determined by how much attention you give that character. You can lift their moods by game-playing with that character and/or giving them presents in their DIVA Room. You'll be able to tell when characters' moods are down by their body language when you select them in Character Select. Or, when unsure, you can view the Character Mood Viewer (キャラクター機嫌確認) chart through Player Records (プレイレコード) on the Main Menu. The moods of all characters will fall when you fail a song.
You might find if the present suits that character, or it's an expensive item, they will cheer on the spot (and the item will become a room feature). Such items have a bigger impact on mood change. At first when you do not have a characters DIVA room it will appear to be in a good mood. Some characters such as Meiko, Neru, and Haku are easier to cheer up than Luka, Rin, Len and Miku. Miku is mostly always happy as well.
(Note: Giving a character a certain kind of item (i.e. wall item, shelf item) as a feature item and then giving another item of the same kind will replace the previous item and you won't get it back. For example: if Neru already has the telephone as her feature item and you give her a Nendoroid Neru, the Nendoroid Neru will take the place of where the telephone was.)
These particular pairings:
Contents
Hatsune Miku
└ Nendoroid Miku
└ Leek Body Pillow
└ Leek Decoration
└ Heart Shaped Cushion
└ Flower Basket
└ Wrapped Candy
Kagamine Rin
└ Nendoroid Rin
└ Chalk Board
└ Star Tapestry
└ Heart Shaped Cushion
└ Flower Basket
└ Wrapped Candy
└ Piko Piko Hammer
Kagamine Len
└ Nendoroid Len
└ Synthesizer
└ Basketball Hoop
└ Cactus
└ Wrapped Chocolates
└ Route 39 Sign
└ Fan
Megurine Luka
└ Nendoroid Luka
└ Heart Shaped Cushion
└ Jewelry Box
└ Magic Mirror
└ Speaker with Stand
└ Flower Basket
└ Wrapped Candy
Kaito
└ Nendoroid Kaito
└ Electric Guitar
└ Ten Gallon Hat
└ Tower of Cards
└ Wrapped Chocolates
└ Route 39 Sign
Meiko
└ Nendoroid Meiko
└ Heart Shaped Cushion
└ Balance Ball
└ Blue Diamond
└ Flower Basket
└ Wrapped Candy
Akita Neru
└ Nendoroid Neru
└ Telephone
└ Heart Shaped Cushion
└ Gold Disc
└ Flower Basket
└ Wrapped Candy
Yowane Haku
└ Nendoroid Haku
└ Scroll (Low)
└ Heart Cushion
└ Flower Basket
└ Lantern
└ Wrapped Candy
Sakine Meiko
└ Nendoroid Sakine Meiko
└ Heart Shaped Cushion
└ Flower Basket
└ Wrapped Candy
Character Poses
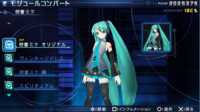
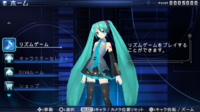
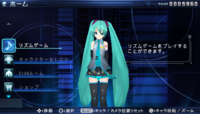
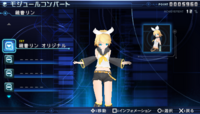
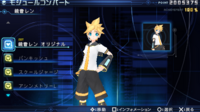
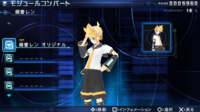
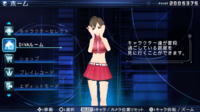
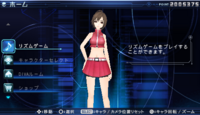
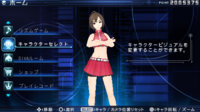
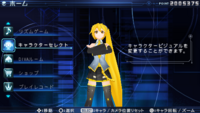
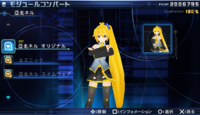
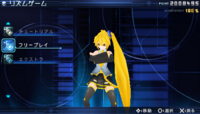
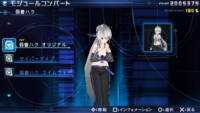
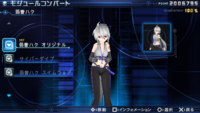
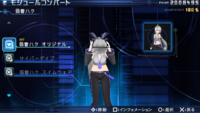
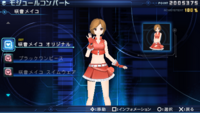
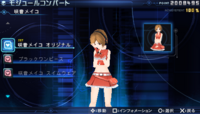
Depending on the characters' mood, their poses can change.
| Happy | Good | Bad |
|---|---|---|
|
|
|
| Happy | Good | Bad |
|---|---|---|
|

|
|
| Happy | Good | Bad |
|---|---|---|
|

|
|
| Happy | Good | Bad |
|---|---|---|
|

|
|
| Happy | Good | Bad |
|---|---|---|
|

|
|
| Happy | Good | Bad |
|---|---|---|
|
|
|
| Happy | Good | Bad |
|---|---|---|
|
|
|
| Happy | Good | Bad |
|---|---|---|
|
|
|
| Happy | Good | Bad |
|---|---|---|
|

|
|


